

Everything you Need to Know About Miter Saws and Getting the Perfect Cut
May 2, 2016
Choose the best miter saw for you, then get clean, on-the-money results using these tips and techniques.
Miter saws help you do much more than simply cutting boards to length. With one, you can make clean and accurate angle cuts past 45°, making them the perfect tool for cutting miters in everything from interior trim to picture frames to structural framing. In this article, you’ll learn five secrets to making better miter saw cuts. But first, let’s look at the three types of miter saws to determine which best suits your needs.
Types of Miter Saws
There are three miter saws: conventional, compound, and sliding compound miter saws. We’ll break it down a bit more for you:
Conventional Miter Saw
This simple machine has a table that rotates past 45° left and right for basic miter cuts. Blade sizes start at 8¼” for a small, lightweight machine for cutting narrow stock. You’ll find a few substantial conventional miter saws with 15″ blades, but the most common saws hold 10″ and 12″ blades—big enough for most trim, decking, and construction projects.
Compound Miter Saws
In addition to having a rotating table like the one on a conventional miter saw, the compound miter saw also has a pivoting head for bevel cuts. As the name implies, the saw enables you to make compound cuts with the blade simultaneously angled left or right and beveled in one direction. Some saws have heads that pivot both ways, allowing you to make bevel cuts in either direction. Most machines accept 10″ or 12″ blades.
Sliding Compound Miter Saws
The sliding compound miter saw is the top-of-the-line choice. It gives you all the advantages of the compound miter saw plus additional crosscut capacity because its head moves forward and back. Available for 8¼”, 10″, or 12″ blades, “sliders” are especially adept at cutting comprehensive stock such as stair treads or 2x12s.
How to Choose a Miter Saw
There are a lot of factors that go into how to go about choosing a miter saw. Many of these factors will depend on your needs, the types of projects you’ll be doing, and your budget.
Blade Size
Depending on your type of work, materials, shop size, desired portability, and budget, a saw with a 10″ or 12″ blade is probably the most practical.
Size and Weight of the Miter Saw
If you move the saw around your shop or to the job site, consider a lighter saw only as significant as necessary. If it will be pretty stationary, a large, heavy saw will give you the most comprehensive range of cutting options in the future. In either case, it’s a good idea to clamp your saw to a surface at a comfortable working height.
How Much Power You Need
Saws with 8¼” blades need less power; usually, 9 amps will suffice. Otherwise, choose a saw with a motor rated at 13 to 15 amps.
Other Considerations
Look for a saw with a dust-collection hook-up, blade brake, positive 0° and 45° stops, miter-table detents at your most-used cutting angles, and a work hold-down.
How To Make Nice Cuts With a Miter Saw:
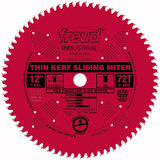 Secret #1: Use a Good Blade
Most miter saws come with a blade for rough-cutting 2x4s. Could you switch it out for a blade capable of making splinter-free cuts in solid woods and sheet goods? Blades with high tooth counts cut cleaner but more slowly. You can use only blades with a negative tooth pitch angle on sliding miter saws.
Secret #2: Wait Until the Blade Stops
A lot of damage can be done when you lift a spinning blade from the workpiece after making the cut. The blade can catch the workpiece and cause splintering. Doing so can also launch a small cutoff piece across the shop or at you. Be patient and wait until the blade stops before lifting it out of the cut.
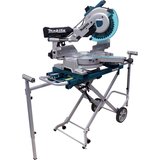 Secret #3: Extend Your Support
For safety and accuracy, longer workpieces should be supported beyond the ends of the saw’s table. Some miter saws have extendable supports. You can also use roller stands. Many portable miter-saw stands have built-in, extendable supports.
Secret #4: Raise the Work Piece to Increase Capacity
If your workpiece is just a bit wider than your saw’s capacity, you can effectively increase the saw’s cutting capacity by raising the workpiece. For example, on a 10″ machine, you can increase cutting-width capacity by about ½” by placing the workpiece on ¾” plywood. Be sure to use hold-downs to keep the boards in place.
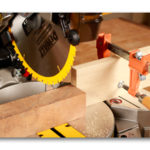 Secret #5: Use Stop Blocks for Repeatable Cuts
Simply clamp a scrap piece to your fence to see multiple pieces to the same length. Place one end of your workpiece against the block, make the cut, and repeat.
View more Tool Tips on the Acme Tools blog!

0 Comments