
Getting Started
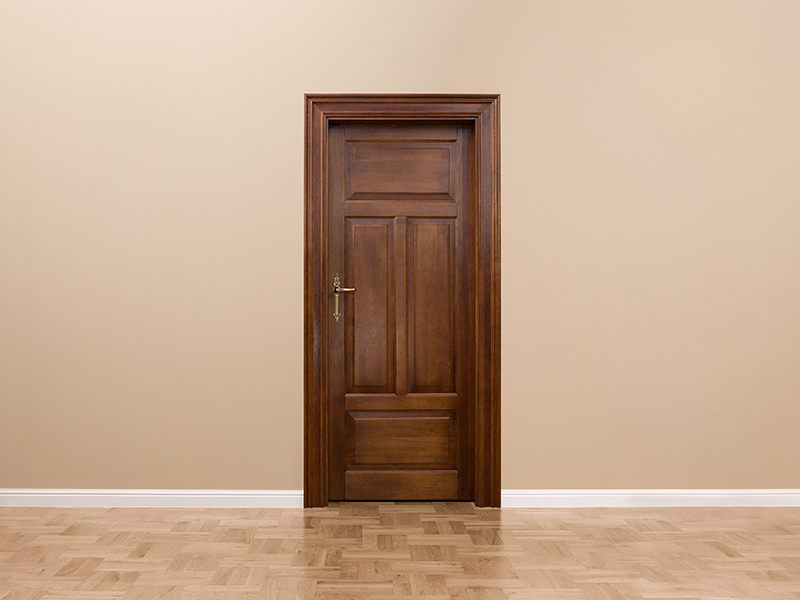
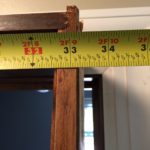 When hanging interior doors the first thing to do is check for proper sizing of the rough opening. The opening should be 2 inches wider and 1 inch taller than the nominal size of the door. The second thing to check is the proper handing of the door.
To check proper handing put your back to the door frame on the side the hinges will be on. If the door opens to your right, it is a right-hand door, if it opens to the left, it is a left-hand door. Next check the inside of your opening and the finished walls for plumb and the floor for level between the hinge and the latch side. Usually things will be off a little so take note of how far from plumb things are.
The key to making this door hanging method successful is to leave the door alone except for measuring and removal of the shipping fasteners until you have your shims installed on the hinge side of the rough opening. When figuring the layout of your shims, plan to keep the door roughly centered in the rough opening. One exception to this is if one side of your rough opening is very close to an adjacent wall. In this case, you may want to add thicker shims on the side of the rough opening closest to the wall. This may make it easier to install casing without ripping it to a smaller dimension than stock. Of course, each situation is unique.
Tools Needed
To hang a pre-hung interior door, you will need basic hand tools like a utility knife, hammer, tape measure, screwdriver and 48″ or longer level. A few power tools will also speed the process up greatly. A cordless drill or impact driver, circular saw, planer, oscillating multi-tool, finish nailer and compressor will save a ton of work.
Checking for Plumb and Installing Shims
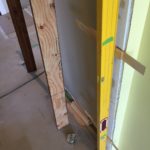
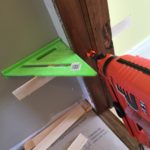
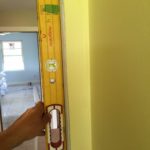 When you are ready to install the hinge side shims, try to locate them behind the hinges. I mark the hinge height on my 78″ Stabila level with a marker or with painters tape. This way all you have to do is place a pair of shims behind the level from opposing sides and slide them in and out to create the desired depth. Then nail them to the studs using a hammer or finish nailer. After the first set of shims is secure, move on to the next sets. Take your time, use your level and nail them off.
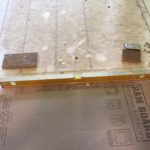
If you are sure your shims are plumb, now would be a good time to cut the extra length off. A good sharp utility knife works well. Just score the shim several times so that it is set back from the drywall edge. After scoring, they usually snap easily. Take care not to pull the shim loose from the nails. I prefer an oscillating multi-tool. It zips right through the shims like butter. You can wait until the jamb is installed as well.
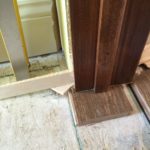 A couple of things to consider before setting the jamb is the height at which you will install it and whether or not to trim one or both of the legs. If the floor is out of level between the hinge side and latch side you may or may not need to trim it. If one side is 1/8″ high or higher and the finished flooring is hard surface, trim one side of the jamb the amount of the difference. If the finished floor will be carpet, do not trim the jamb unless the difference is over 3/8″. The height will be determined by the flooring. If the flooring is not installed yet, use a scrap of the flooring as well as any underlayment as a spacer on the hinge side of the opening. Place the thin end of a shim on this spacer or the finished floor. If the flooring is going to be carpet, place the thick end of a shim where the hinge side jamb will sit (approximately 5/16″-3/8″).
If the jamb is up to around 1/16″ wider or narrower than the finished wall, you can divide the difference between the two sides, rather than set it flush on one side with a gap on the other side. If the difference in width is 1/8″ or larger you will need to plane the jamb or add jamb extensions. Up to this point, everything has been prep work. Now the fun part begins.
Installing your New Door in the Rough Opening
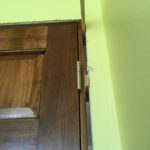
 It is time to set the door assembly in the rough opening. Make sure the hinge side is touching all your shims. Look closely at the head jamb reveal before nailing. You do not want the gap to be larger on the latch side at this point. It needs to be even or smaller. Use a speed square or other small straight edge to flush the most visible side of the door to the finished wall at the top and nail through the top shim with 2-1/2″ 15ga finish nails. Work your way down to the next shim and then the bottom all the while keeping the jamb edge flush with the finished wall. To fully secure the door to the wall use screwdriver or cordless drill to remove a screw from each hinge and replace them with a 2-1/2″ or 3″ screw that reaches the framing material. Be careful to just get them snug. If you drive them too deep you can distort the jamb so that it is much harder to hang straight.
Finishing Touches
 Once the hinge jamb is secure, you can work your way around the head jamb and the strike jamb. Nail in extra sets of shims to keep an even reveal or gap all the way around the door. You will probably find that each leg jamb will need 5 or 6 shims to keep them straight. The strike plate is always one place to install shims. The top may need just one in the center or maybe 2 or 3 pairs at the most. Now the door assembly will be properly installed and with all needed backing to keep it operating for years to come.


One Comment
James Mason
August 18, 2016 at 9:19 pmGreat write up Paul, well laid out!