
Making an addition? Finishing a basement? Building a shed? If so, you’ll probably need to build a wall with at least one door. From lumber and hardware to power tools and cordless tools, here’s what you need to know to make this as simple as 1, 2, 3! Shop now at Acme Tools.
1.) Measure And Plan
First, check your local building codes to make sure you are compliant.
Measure the length for the new wall. Also measure the height of the ceiling (if a ceiling is already in place) in several places along the length of the wall. Often, the ceiling height will vary slightly along the length of a room. Find the shortest measurement from floor to ceiling and build your new frame to this height.
Determine the number of studs required to build the wall by dividing the length measurement by 16 inches. Add two additional studs for “end studs”. If your ceiling measurement is 8 feet or less, you can use 8 foot lumber for the studs. If the height is over 8 feet, use 10 foot lumber for the studs. Take the wall length measurement to choose boards for the top and bottom plate. Two-by-fours are available from 8 feet, to over 20 feet long so choose boards that are a bit longer than the length so you can cut them down to size.
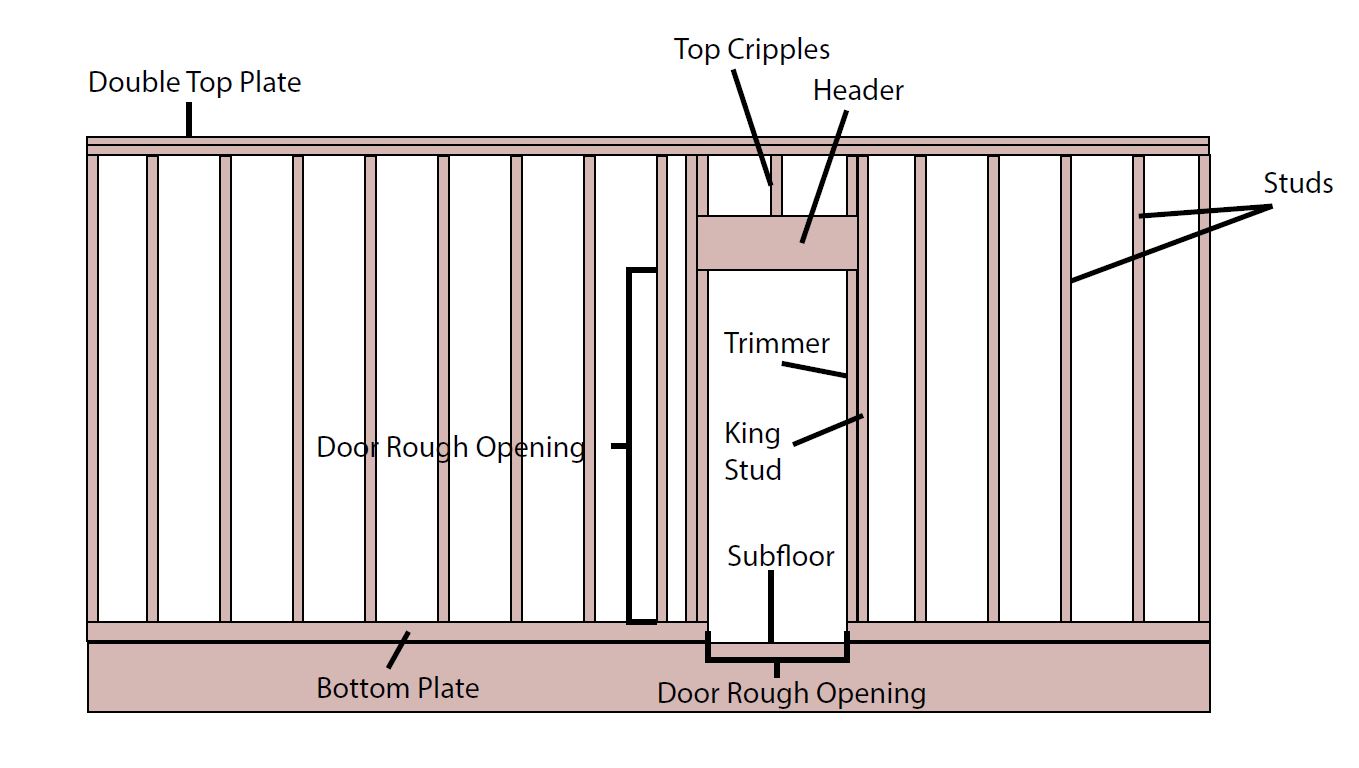
Because you’re adding a door, you’ll also need to account for the door frame. The door frame will consist of two king studs, which run the entire height of the wall frame; two trimmer studs (or jack studs), which fit inside the king studs and are the same height as the door casing; and a horizontal header across the top of the door that preserves the structural integrity.
2.) Build The Frame
Cut the top and bottom plates to the measured length of the new wall. Take the shortest ceiling measurement, subtract the thickness of the two plates, and cut all the studs to this length. Calculate the placement for any door opening and cut the jack and cripple studs to length. Cut the header and have it ready when you layout the rest of the wall framing.
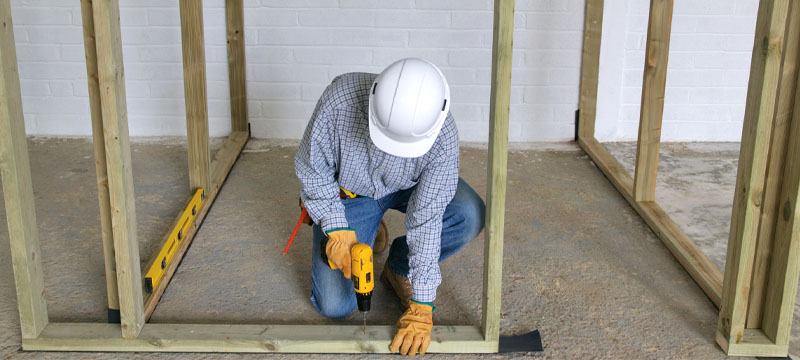
It is much easier to build the wall frame on the floor, then pivot it up into position. This is called tilt-up construction.
Build the frame with the lumber laying on edge, on the floor next to where it will be erected. Start by laying the top and bottom plates side by side and measure starting from one end. Mark both plates simultaneously, every 16 inches along their length for the studs. Then, mark the location for the door opening. (Note: A frame should be built to accommodate a door with the bottom plate in place for stability. The plate can then be cut out after construction is complete.)
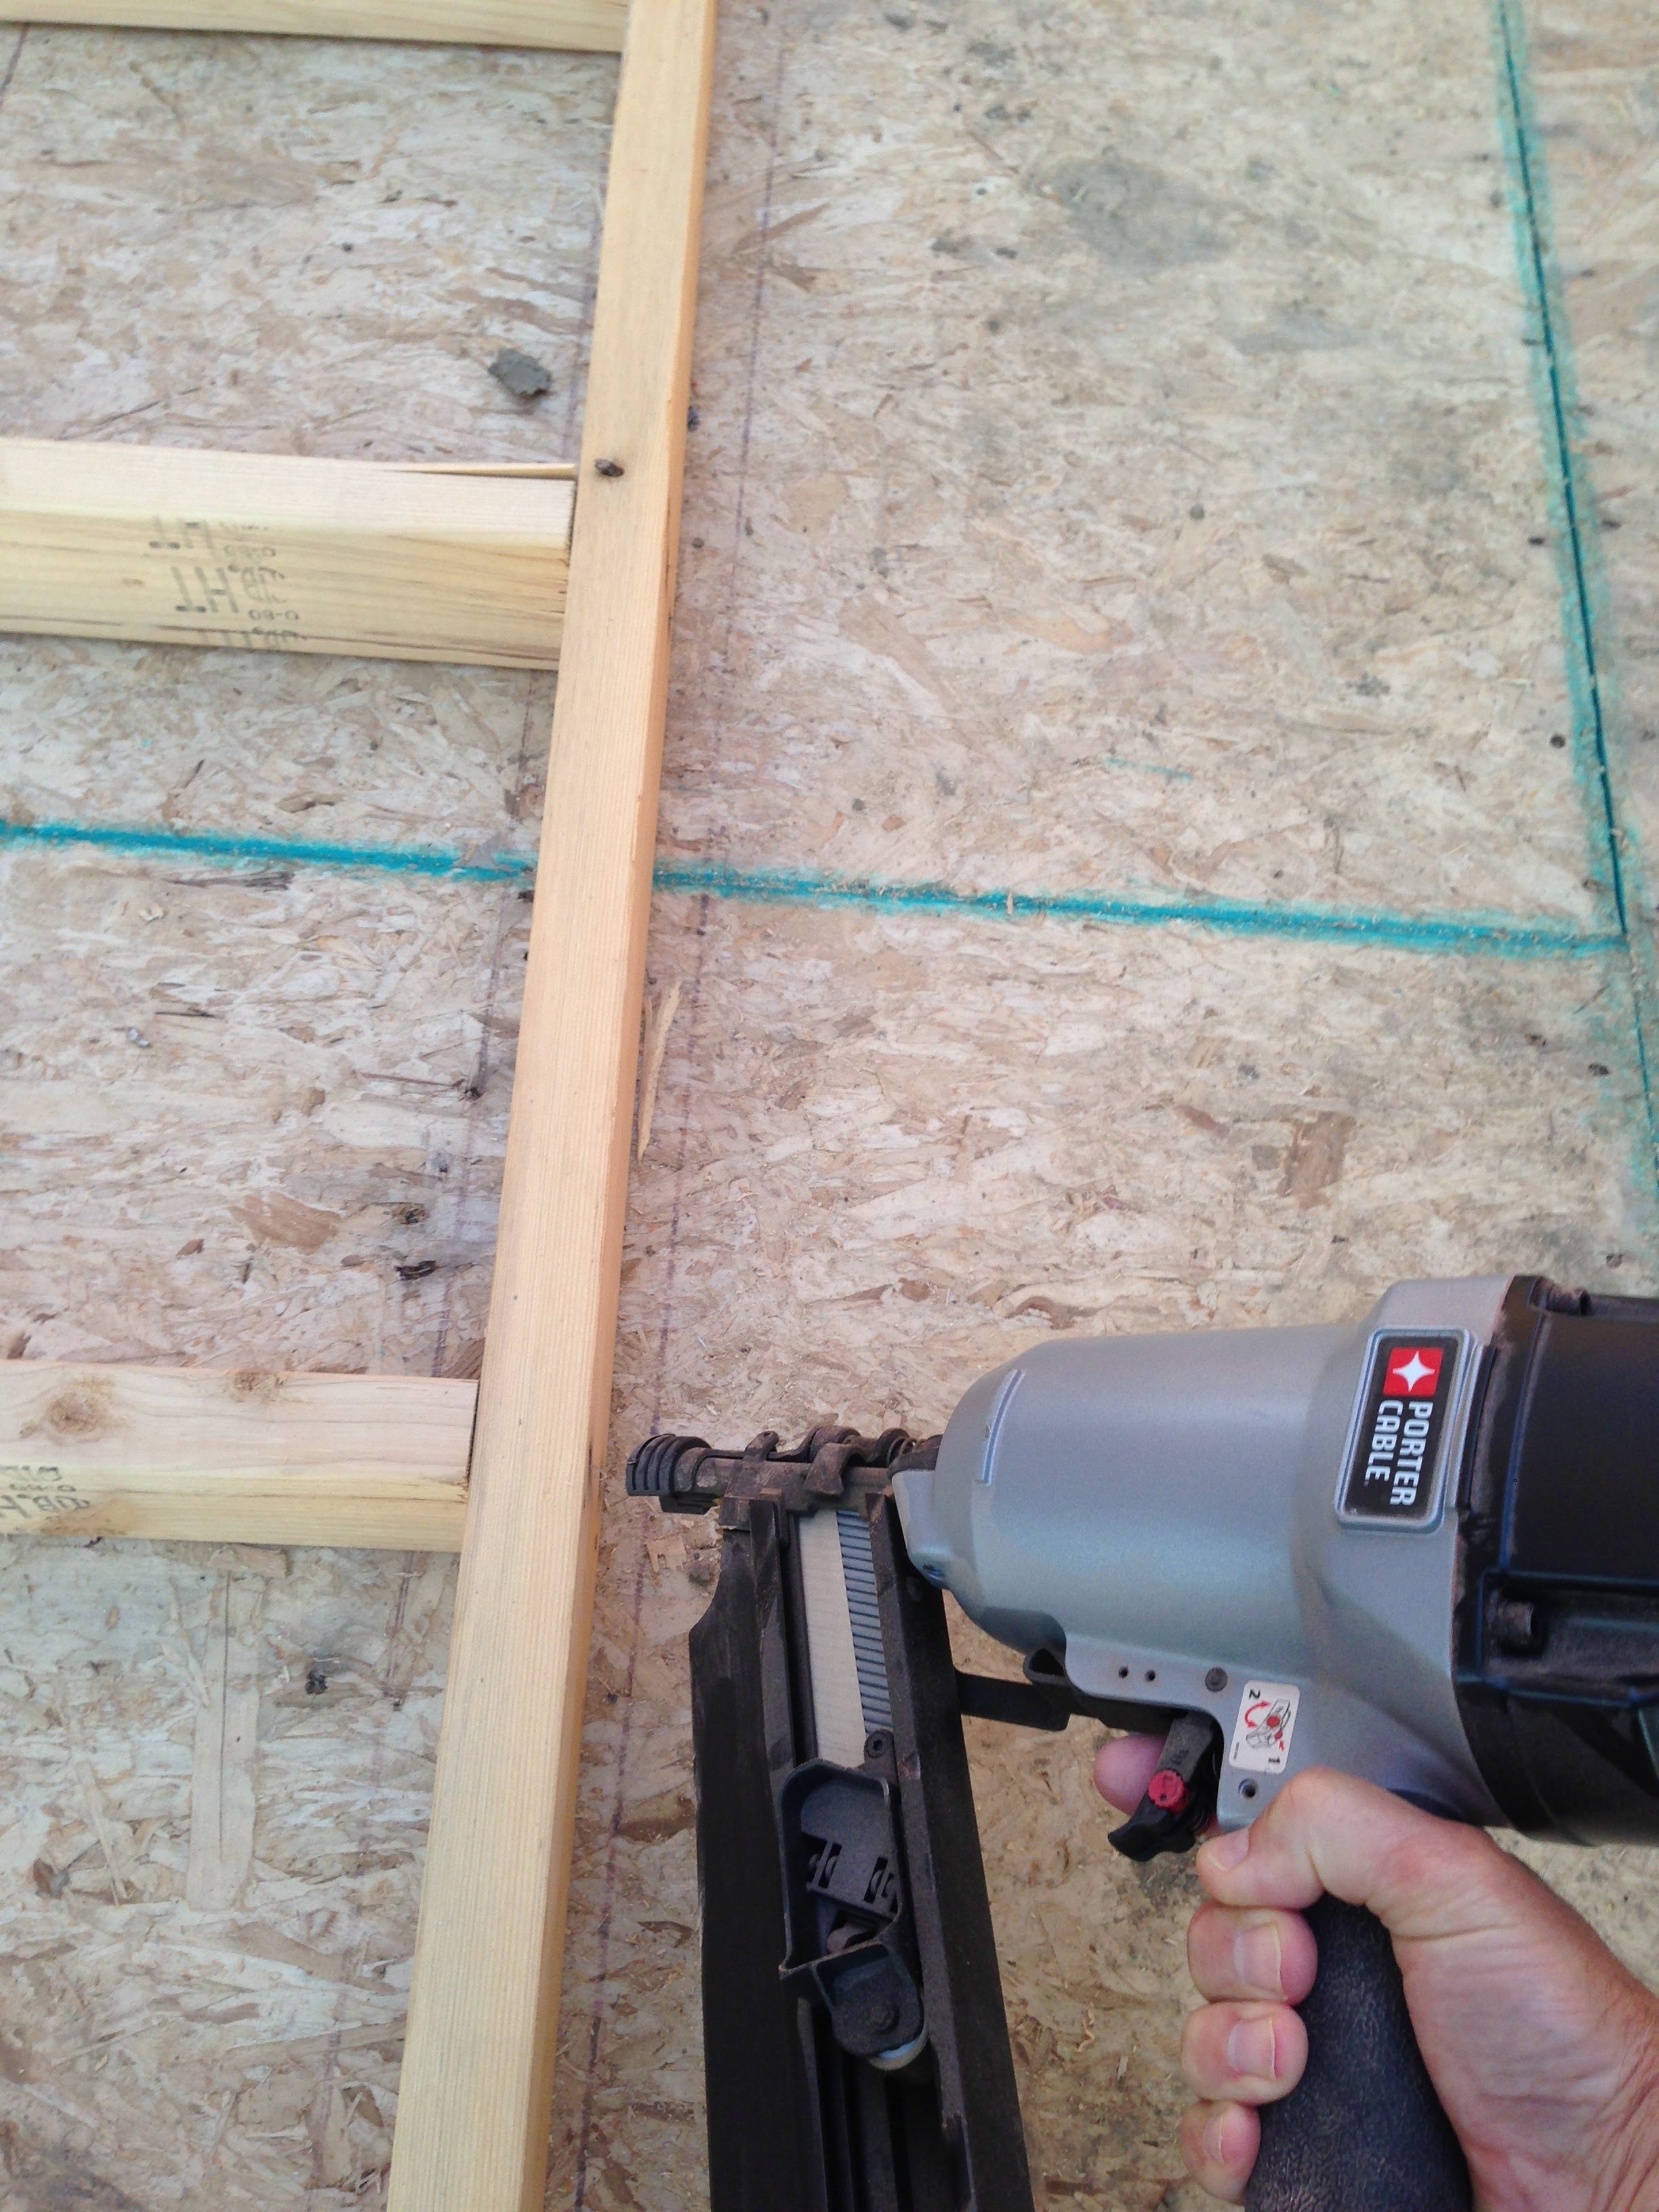
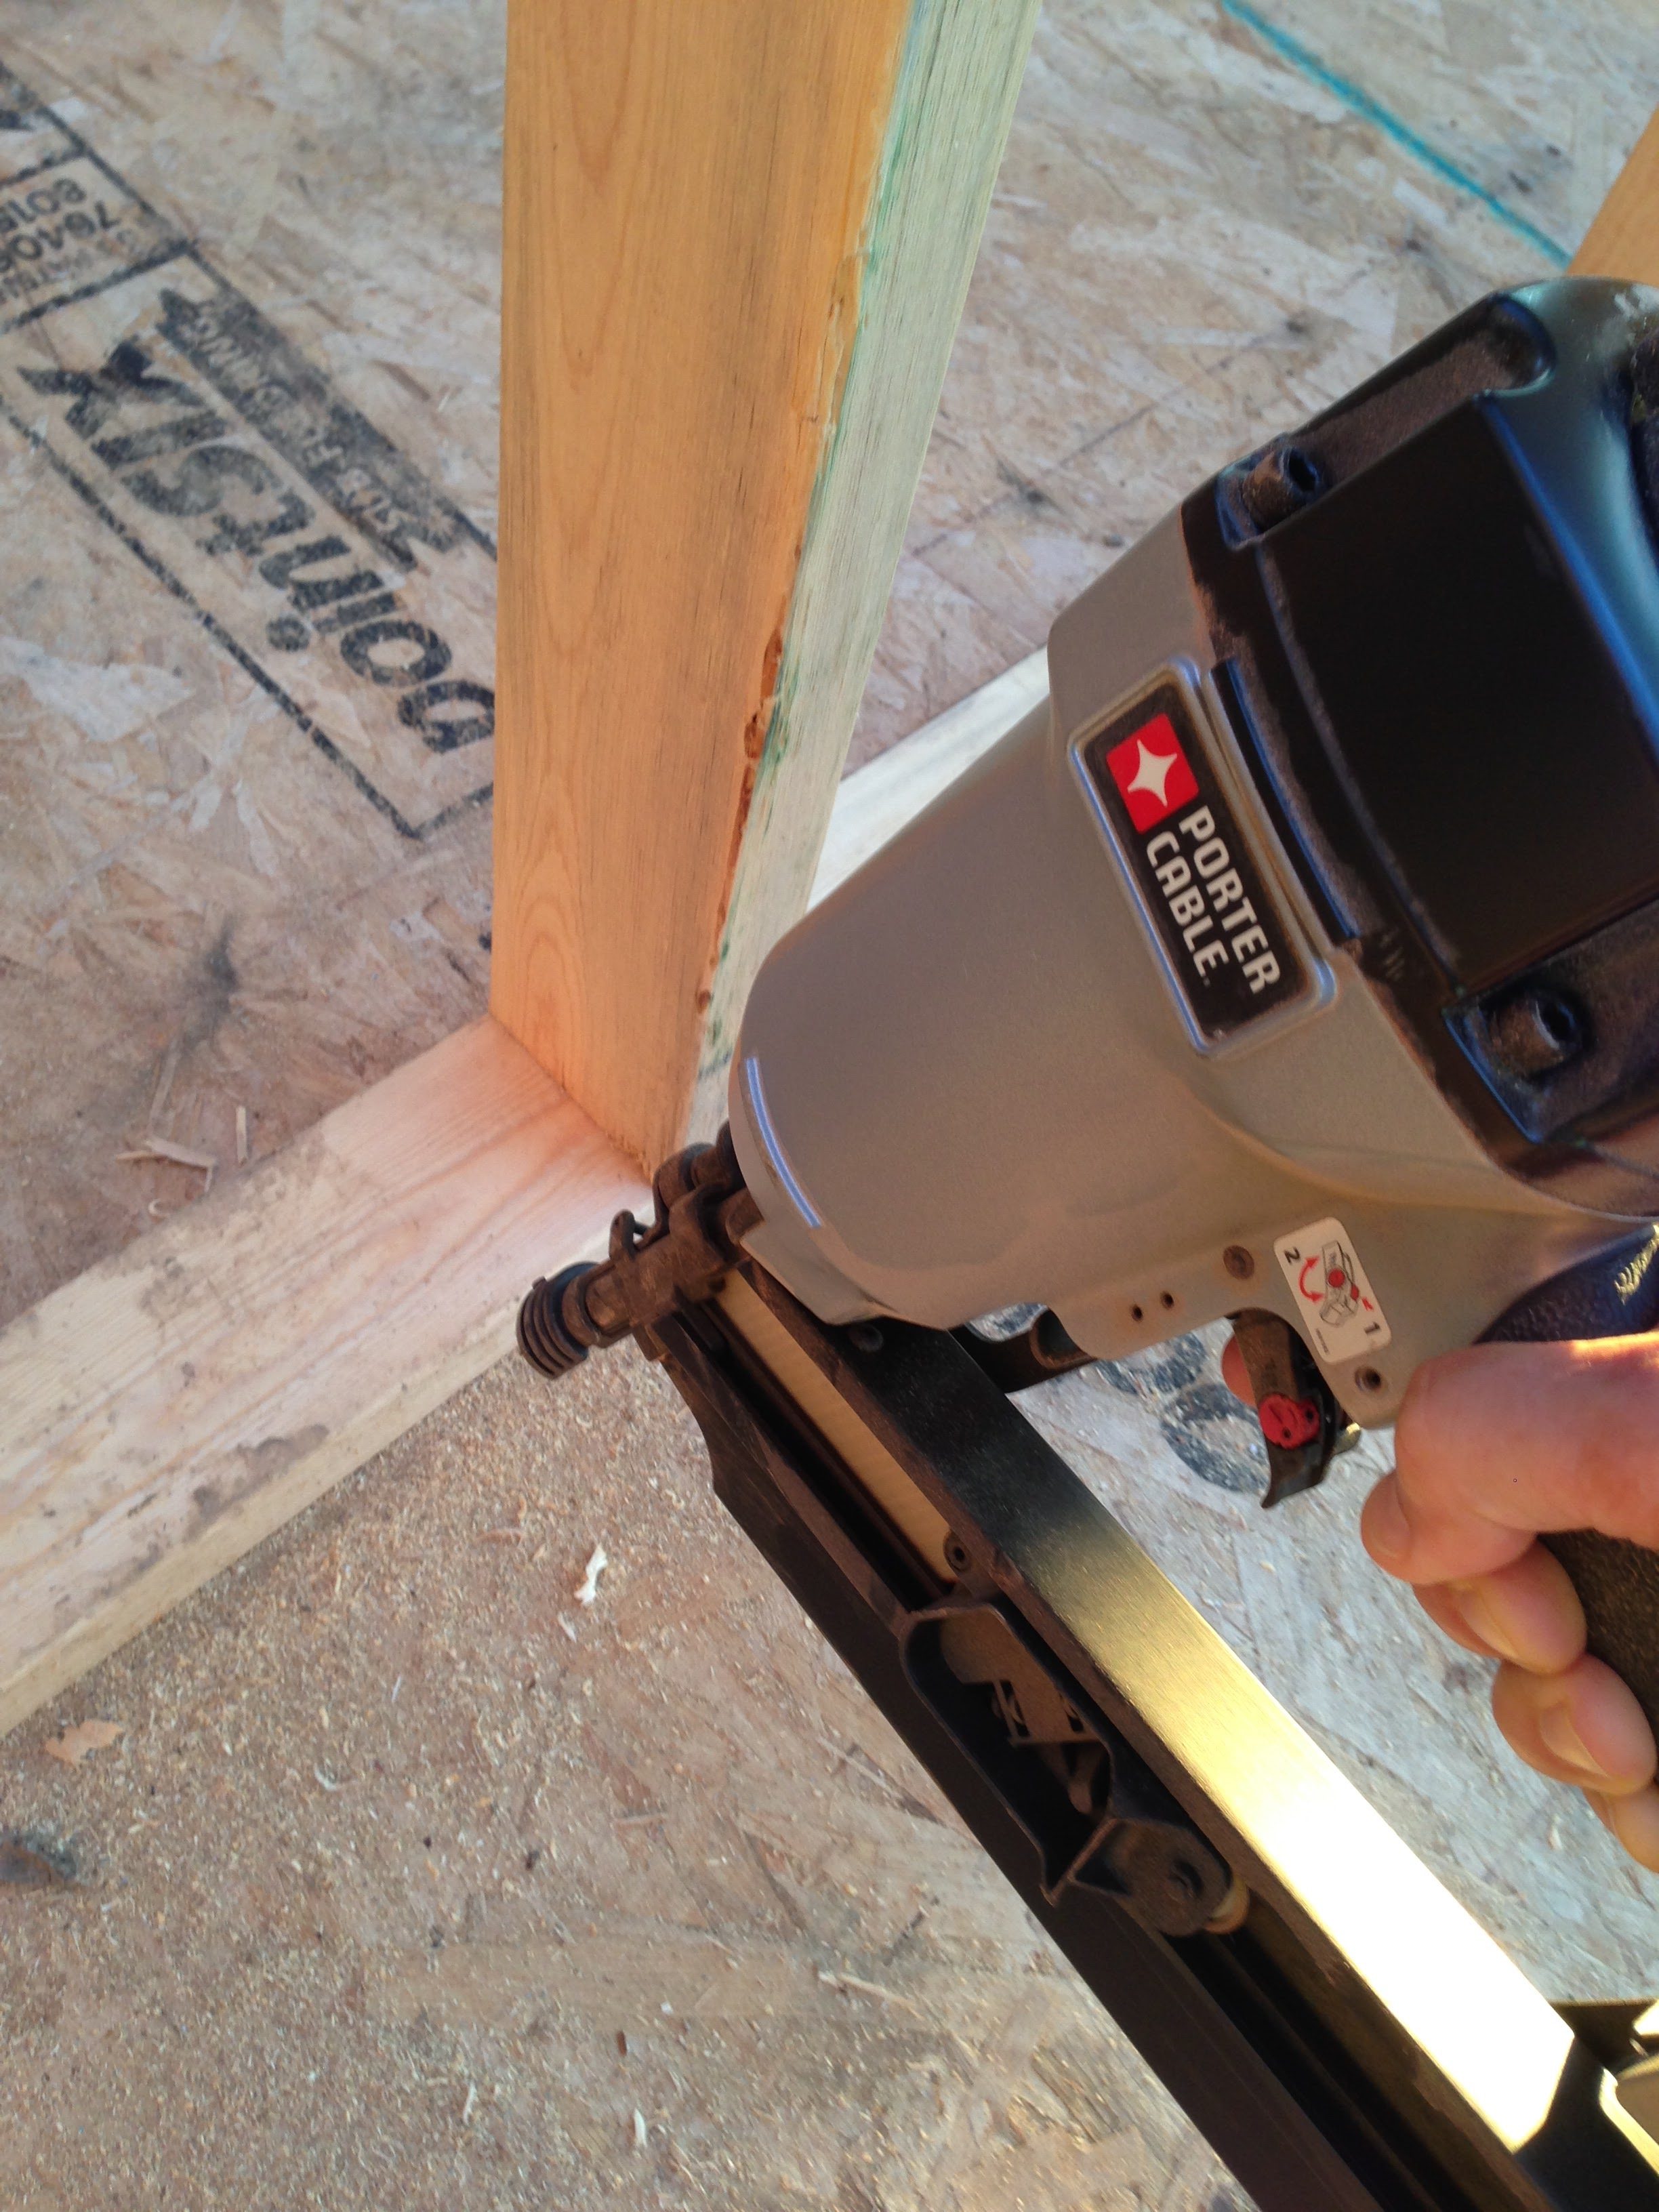
Separate the plates and lay the pre-cut studs between them so the centers align with each mark. Use a framing nailer to attach the framing members to create the wall. Nail through the sill and header into the studs for stronger joints. Cut and dry-fit the other components of the wall, making sure the distance between the trimmer studs is correct for the door casing. Nail the king studs in position, then nail the trimmer studs ihttps://www.acmetools.com/shop/tools/pneumatic-nailersnto the king studs and attach the header.
If building the wall on a concrete floor, e.g. in a basement, use pressure-treated lumber for any part of the frame that will come in contact with concrete. The sill plate should be pre-drilled for anchor bolts that attach the wall to the concrete.
3.) Position And Attach The Wall
Tilt the completed frame upright and shift it out of the way. Snap a straight chalk line on the floor to show the wall’s desired position. Use a long level and a pencil to extend the line up the wall. If the new wall will attach to a framed wall, make sure it will be positioned at a stud. If it’s attaching to a concrete block wall, position the wall so it lines up with the middle of the blocks.
Move the wall into place. Set the new frame plumb and square using a level held against the edge of the studs. Tap the plates one way or the other until they align with the marks and all your studs are plumb. If any point along the new wall frame is not snug because of variances in the ceiling height, use wood shims driven under the bottom plate to tighten the fit.
Use a framing nailer to attach the wall to the floor before attaching to the other walls. To secure the wall to the concrete floor, use a drill with a masonry bit to drill a pilot hole through the pressure-treated sill and into the floor. Use a hammer to pound 2-1/2″ hard-cut masonry nails through the pilot holes and into the floor.
Nail the wall frame to the walls on either side. If attaching to a concrete block wall, drill pilot holes and nail into the center of the concrete blocks, where the blocks are the strongest. Don’t nail into the joints between the blocks; it’s not secure. When attaching to a wood-frame wall, make sure to nail into a stud.
After the framing has been installed, cut the bottom plate to accept the new door. Use a handsaw to cut through the 2×4 plate right next to the trimmer studs. Protect floors from the saw blade with a scrap piece of plywood or a similar, thin material. Cut the plate, stopping about 1/8 inch from the floor, and use a chisel and hammer to finish the job.


6 Comments
Rodolfo Torres
April 26, 2021 at 9:33 pmThank you !
Juan Salinas
August 15, 2021 at 1:35 pmNice explanation of everything, much appreciated, many thanks
Al Birmingham
August 31, 2021 at 12:15 amThe idea of this is new to me, but it’d totally work for a wall. Thanks for sharing, great post!
Bob Hurst
September 29, 2022 at 5:04 pmThanks !!! That was perfect, not one step was left out. I could understand why & how every thing had a certain placement & order to be constructed. The instructions gives a person the confidence, that is needed to get-er done. Thanks again..
Tobias
April 12, 2023 at 1:58 pmThanks for the explainer, this was very helpful! The only thing that’s missing is you didn’t explain what type of wood to use for the header of the door frame. Is it a 2×6?
Acme Tools
April 13, 2023 at 10:41 amHello. Thank you for your question. The size of the header depends on the width of the opening. You will want to check the code for your local area. Still, the rule of thumb is that any rough opening 48″ or less can be framed with 2 2x4s fastened back to back and installed in the framing on edge. This will create a nominal size header of 4″x4″ (actual 3″x3-1/2″). Often times you will see contractors add a piece of 1/2″ plywood in between the 2×4’s to make the framing piece 3-1/2″x3-1/2″ and it will fit flush with both sides of the King Stud and Trim Stud.
Thank you,
Acme Tools